Gamemasters · Campaigns
Create a Campaign → Path → Node
Build the content tree. A House holds Campaigns, a Campaign holds Paths, paths hold Nodes, and every Node is a run of Checks closed by an Engagement quiz. Deleted work waits in Trash, and every AI save leaves a restore point.
Verified against app build 2f427ecbd · 2026-10-07
RPGLMS content is a tree. A House (the course) holds Campaigns (units); a Campaign holds Paths (chapters); each path holds Nodes (lessons); and each node is a run of Checks (lesson steps) closed by an Engagement quiz. Any authenticated user, including Free, can create a course and author this tree by hand; only AI generation requires an upgrade.
Your first course and your first unit are made together
There is no separate “create a course” screen. Creating a campaign from a top-level surface mints the House and its first Campaign in one transaction, which is why the create flow asks about the course before it asks about the unit. A Campaign always belongs to exactly one House. A course can stand with no units: delete its last unit and the course stays, but students can’t join or play it until it has a campaign again.
How a node is built
Every node teaches one learning objective. Its Checks are grouped into Beats: each Beat is an Investigation (take something in, then solve a clue from it) closed by a Report (weigh the evidence and take a side). A node can end on a Finale, a Reflection with no side to take. The Engagement is the node’s quiz. Students meet the Checks one at a time and never see the word Beat. See Build a node’s checks.
Try it without an account
Authoring is reachable in the free sandbox at app.rpglms.com/?demo=1. The whole app runs against local storage, so you can build a real tree and nothing leaves your browser. AI generation and source curation are switched off there.
There are two doors
Which questions you’re asked depends on where you started, and each door has already answered “which course” by the time you tap it:
- Create House (Course) — from a top-level surface (My Houses, Base Camp, the drawer). Mints a new course and its first unit. Four steps.
- Create Campaign (Unit) — from a course’s own screen. Files a new unit into the course you’re standing in. The same steps minus the course act: two.
Everything below walks the first door.
Step 1 — the House
Open My Houses and start a new course
Go to My Houses and tap the create control, or Create House (Course) from the empty state (“No Houses yet”). The screen lists Active Houses and Archived Houses, and it is the only place an archived course can be reached and un-archived.
Name the course and say what it covers
The first step is headed What you’re teaching — “What this House is called, what it covers, and who it is for.” Enter a House Name, then its Subject and Audience.
The course’s name is the only name in the hierarchy you write by hand. A unit has no title field at all: its Framing Concept is its identity, just as a Path’s Guiding Question is the Path’s.
Capture pendingThe first step of Create House (Course) showing the House Name, Subject and Audience fields1440 × 900 · 16:10Subject and Audience are the course's, not the unit's.verified @ 2f427ecbd Set the Lore, or leave the default
The last thing on this step is Lore — “The Lore your new House plays in — edit it to make it yours.” It opens showing the built-in world, read-only and badged as the default; editing it opens the Lore editor and the result is attached to the course when it’s minted.
Lore belongs to the course, which is why it’s asked here and not on the unit step: one world all year, and every unit plays inside it. A course with no Lore authored plays in the Default world — a legal state, not an unfinished one. See Setup & Use Lore.
Step 2 — how you want to build it
Pick manual or the wizard
How you want to build it — “Author the campaign yourself, or answer a few questions and let the wizard propose one for you to review.” Two cards:
- Build it myself — you author every step. This is the route the rest of this page follows.
- Build it with the wizard — the wizard opens with a learning-path request already written for you to review before anything is saved. See Build a whole campaign with AI.
Tapping a card both chooses and advances, but Next stays available, so going Back and carrying on without re-tapping works.
If you don’t have AI access the wizard card renders locked rather than hidden — it explains the gate and links to the upgrade, so you learn it here instead of hitting a refusal three screens later.
Capture pendingThe create stepper's How you want to build it step with the Build it myself and Build it with the wizard cards1440 × 900 · 16:10The fork is a step of the sheet — after the course act, before the unit act.verified @ 2f427ecbd
The wizard plans a unit, not a course
That’s why this question comes after the House step. The AI wizard’s scope is a campaign, a path or a node, with no course-level scope, so asking before the course had a name asked it out of order.
Step 3 — the Campaign
Give the unit its framing concept
What you’re teaching — “The concept this campaign is built around.” The Framing Concept is the one required field, and it is the unit’s identity on every surface that names it.
There is no Title, Subject, Audience or House field here. All four are the House’s; this step asks only what this unit is about.
Capture pendingThe Campaign step showing the Framing Concept field under the What you're teaching heading1440 × 900 · 16:10Framing Concept is the unit's identity — there is no separate title.verified @ 2f427ecbd Write the Quest
The story — “The Quest this campaign tells, and the opening your students read.” The Quest is the unit’s narrative, distinct from the course’s Lore: the quest type and tone are picker pills on the opening’s lead-in line, then the opening itself is a fill-in-the-blank passage, then the Boss is built as a character mad-lib.
Picking a course settles the setting and settles nothing about the arc — so two units sharing one Lore can play very differently.
Capture pendingThe story section showing the quest type and tone pills above the opening's blanks1440 × 900 · 16:10Type and tone as pills, then the opening's blanks — the Boss mad lib follows below.verified @ 2f427ecbd Add vocabulary (manual only)
A Vocabulary field follows on the manual route. It’s hidden on the wizard route on purpose — the wizard writes a unit’s vocabulary, so asking for it first would be asking you to do work you just delegated.
Step 4 — the first class
Name your first Party and publish
The last step creates the course’s first Party (cohort) and carries the Ready to Play toggle — “When on, students in this campaign can enter it. Turn it off to keep authoring without anyone playing what you have so far.”
A Party enrols in the House, so this step belongs to the door that mints one. Filing a unit into an existing course skips it (that course already has its classes) and carries the publish toggle on the unit step instead.
Clear the name if you don’t want a class yet.
Create, and take the join code
Tap Create. The server mints the course, its first unit, the Lore and the first party in one transaction, then hands you the join code, large enough to read across a room and one tap from the clipboard. One code covers every unit of the course, now and later.
You then land on the new House — the course page. (On the wizard route you land in the Builder instead, with the wizard already waiting.)
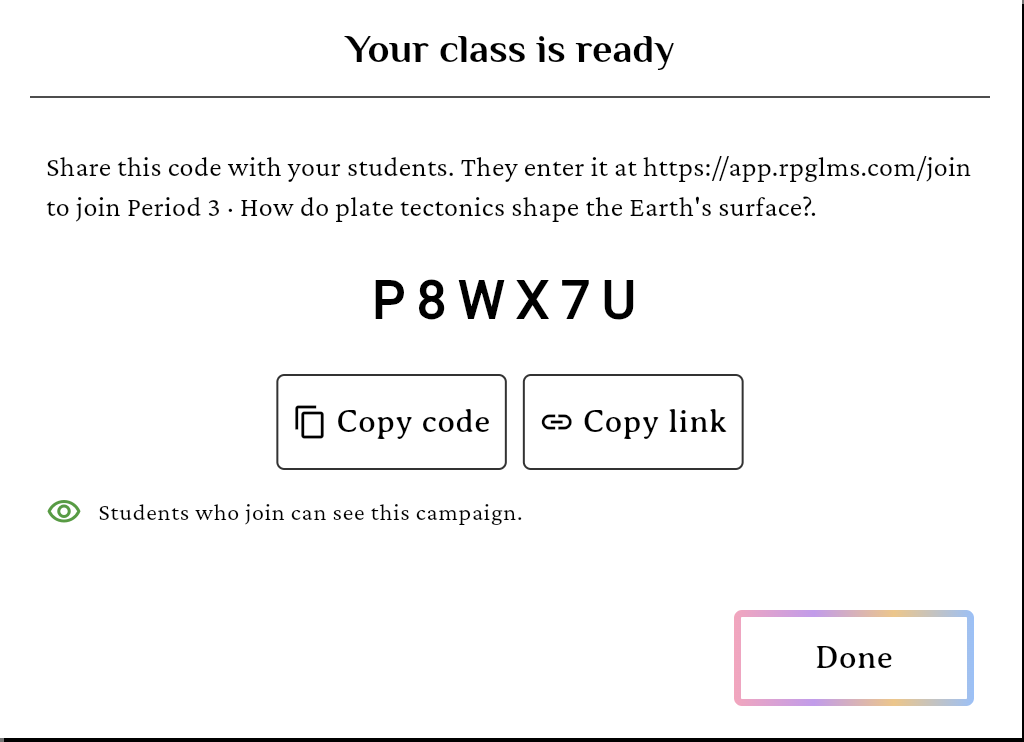
The join code is the deliverable — one code for the whole course.verified @ 2f427ecbd
Co-teaching is an invitation, not a setting
You own what you create outright. To share a course with another teacher, invite them as a collaborator from the course page. See Invite collaborators.
The builder
Open a unit and you get the Builder — that unit’s whole structure on one canvas, under a stack of header bands:
- The locator — which course you’re building in (tap to switch units), and a Lore door to the course’s world.
- The unit — its framing concept, its quest type, and whether it’s published. Its ⋮ menu holds Edit, AI Wizard, Trash, Restore points and Delete.
- Vocabulary — expands to its list.
- Sources — expands to its list.
Below them, the Paths divider lists the chapters, each with its mob and node count. Every row expands in place, so you can work down from the unit to a single node without leaving the page — the order the rest of this guide follows.
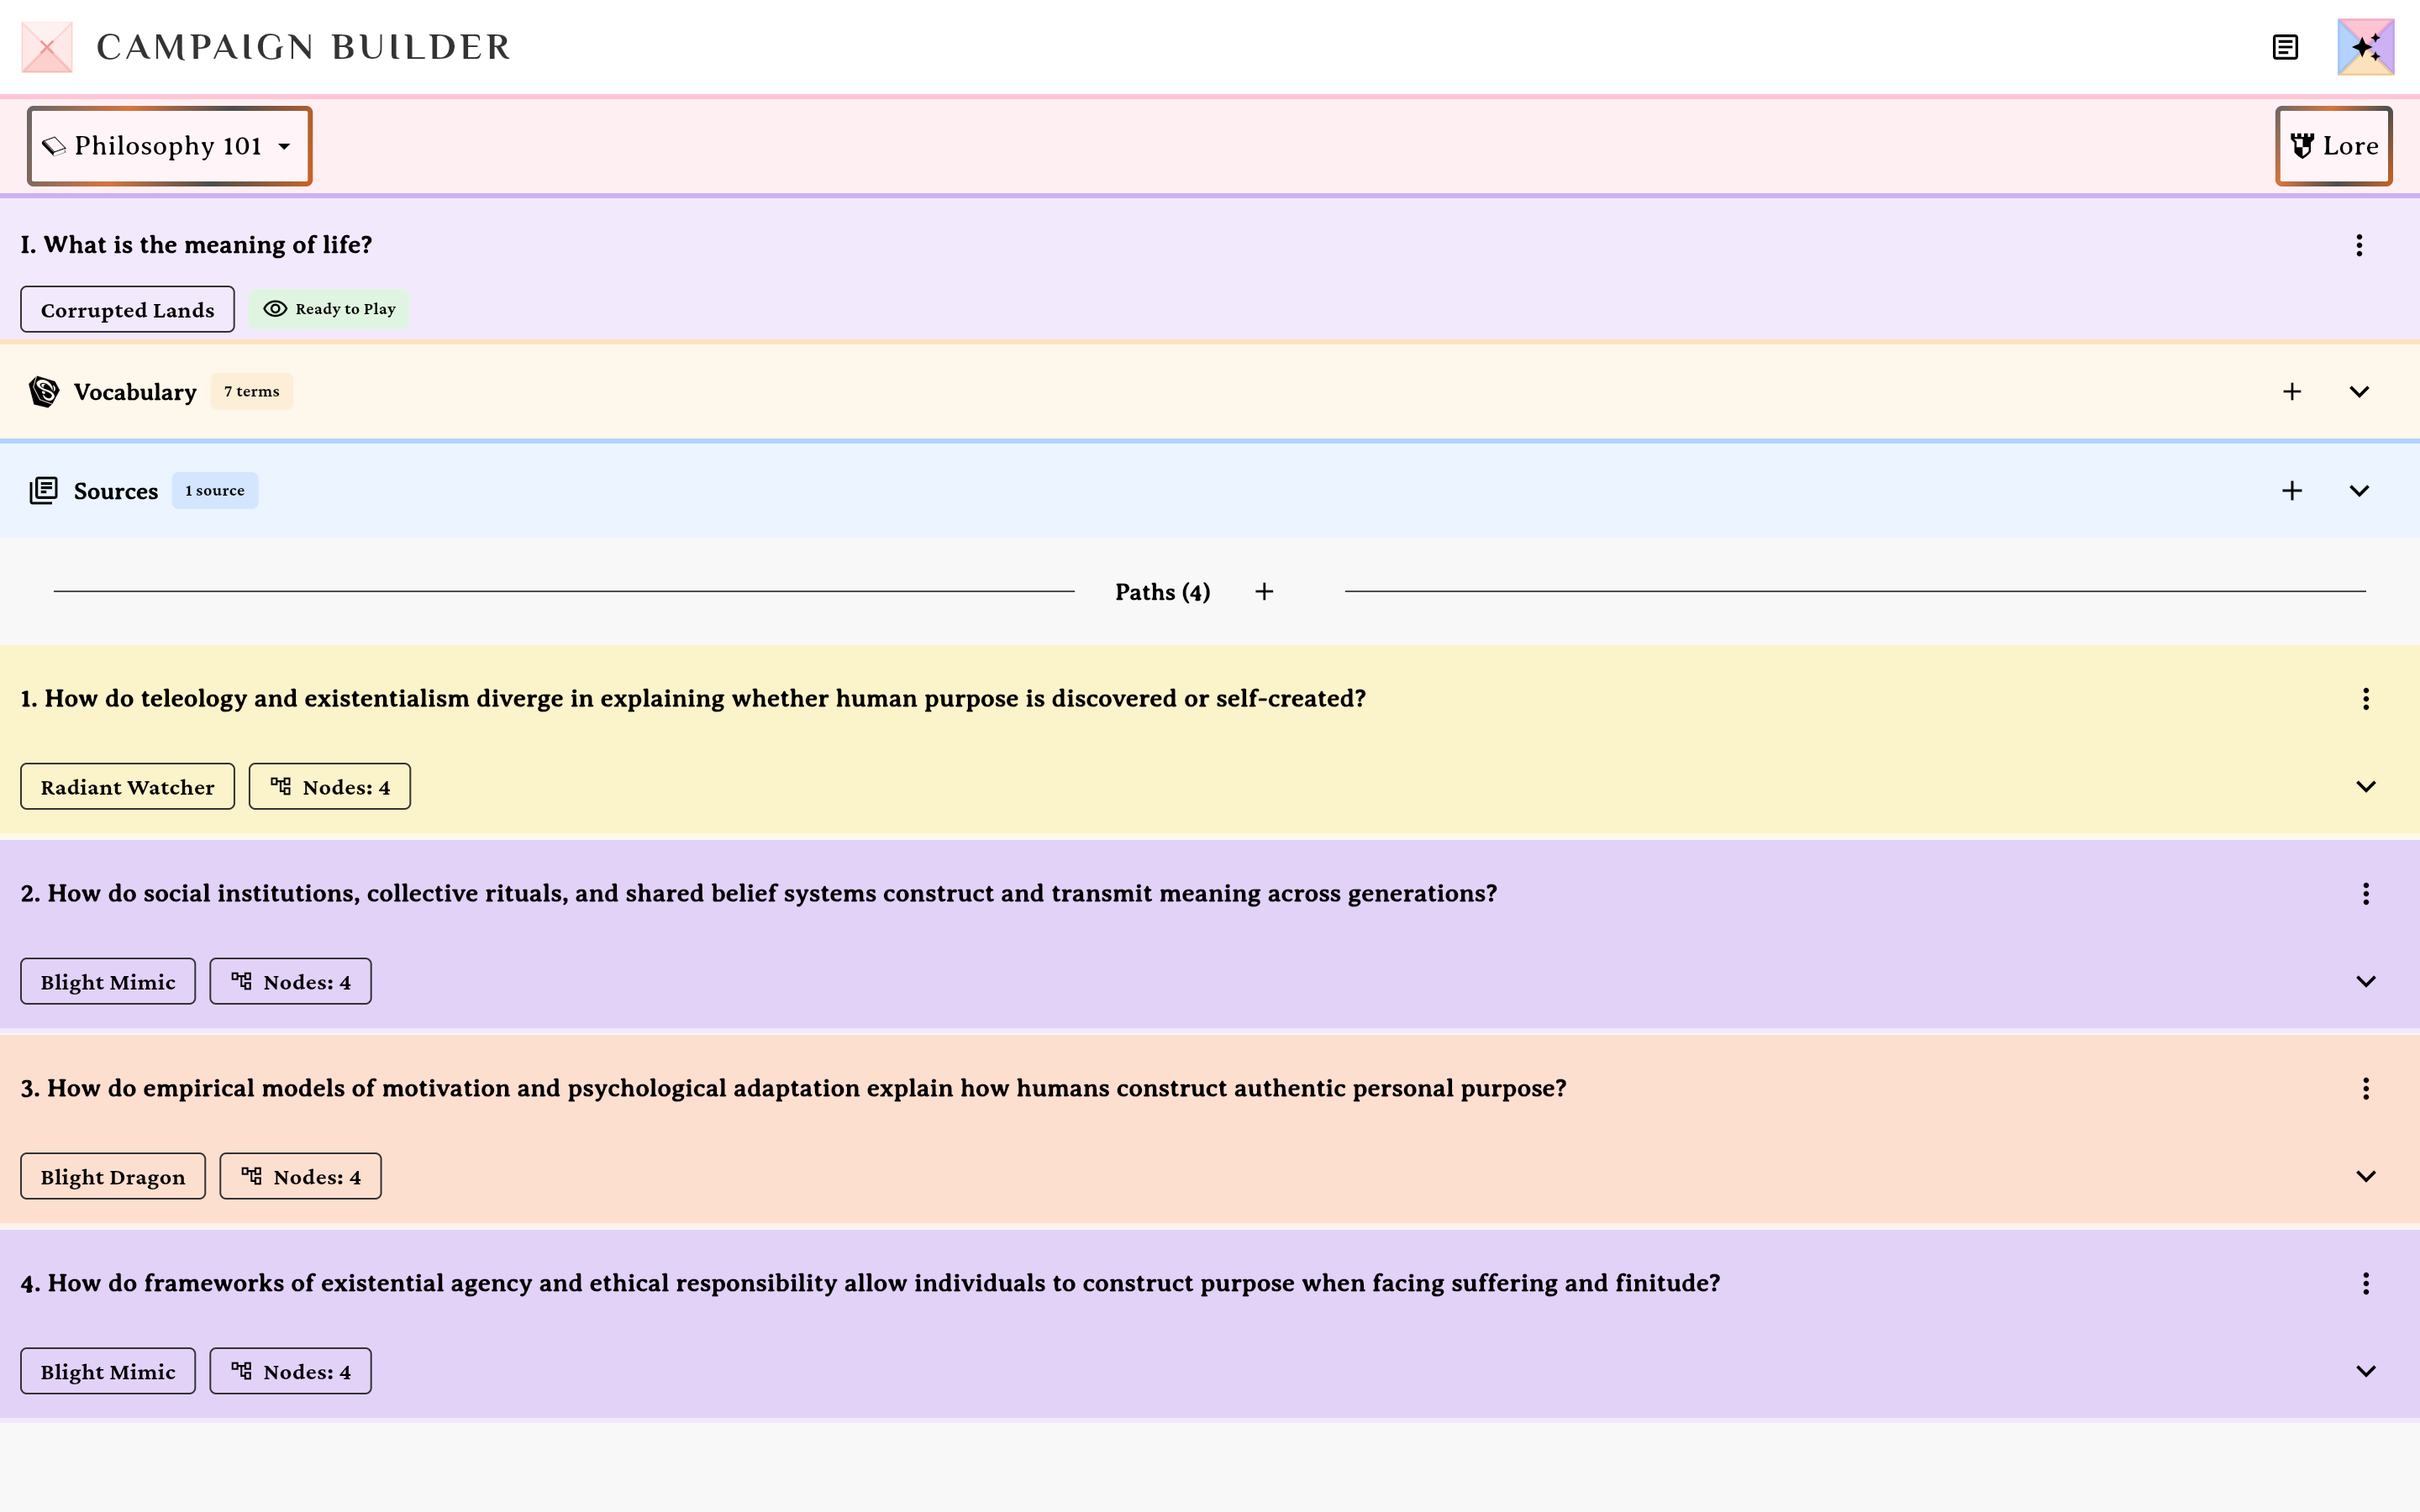
Parties and Lore are not in the builder
Both are course facts, and the builder is a unit workspace. A Party enrols in the course and plays every unit of it, so it’s managed from the course page; the Lore is read and edited there too (the builder’s Lore door is a shortcut to it, not a copy of it). Picking an arbitrary unit in order to edit something belonging to all of them was the wrong grain, and it was removed.
Add a path
Add a Path from the builder canvas
On the Paths divider row, tap the + Add control. The Create Path sheet opens.
Fill the path form
The required field is the Guiding Question — it’s the path’s headline in both the builder and the student view. Below it, a single section headed This Path’s Story composes the path’s region, boss/mob, and story together as one fill-in-the-blank passage. Its subtitle spells out the contract: one word per blank, tap a highlighted word to change it, and the passage becomes the description your students read. There’s no separate Description field or two-stage boss/mob picker; this passage text is the path’s Description. You can still set an optional Prerequisite path.
Under the Guiding Question sit four story token pickers — character, place, force, and vocabulary. Connecting a token binds a name rather than typing one: it resolves into the prose wherever it appears and renders highlighted, so renaming a character once updates every passage that references it.
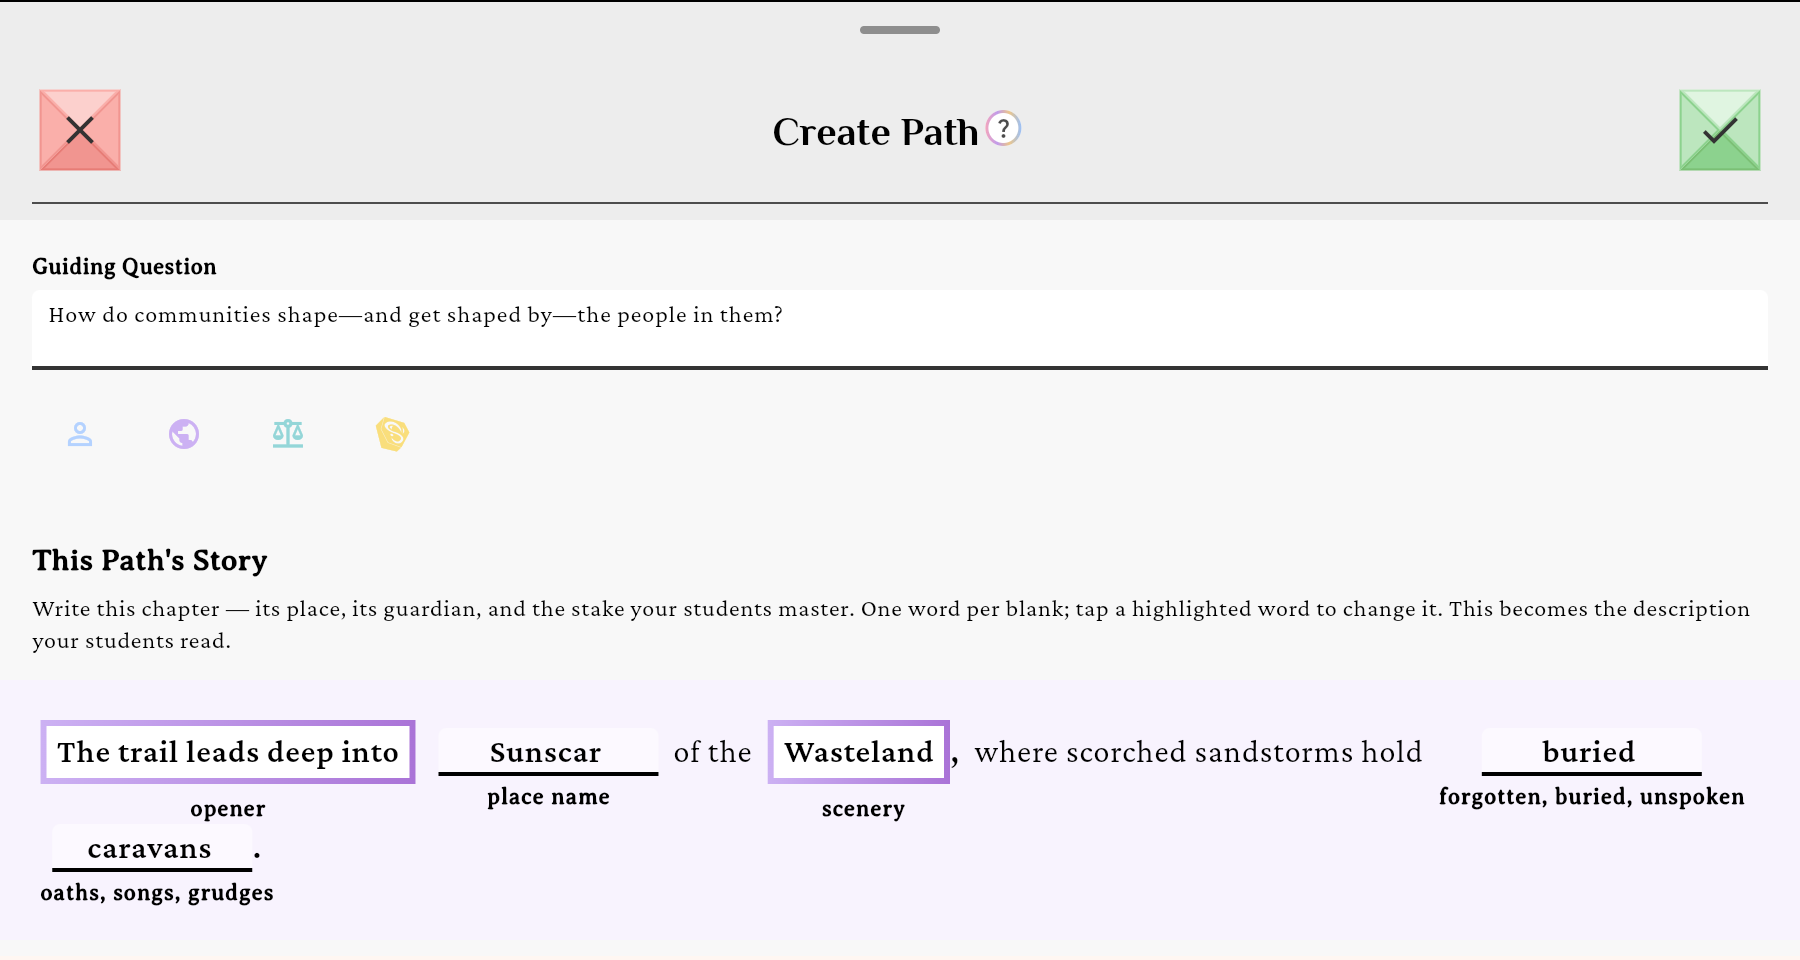
One merged passage sets the region, boss/mob, and story together — it becomes the path's Description.verified @ 2f427ecbd
Quiz settings come later
A path’s Trial difficulty settings (hearts, timer, passing %) are editable only when you edit an existing path, not at create time. See Authoring quizzes.
Add a node
Open the path to see its nodes
Expanding a path swaps its summary for a Nodes list. Each node carries its Published state and two count chips, Checks and Questions, so you can see which nodes still need work.
Add a Node to the path
Expand the path and tap Add Node in the Nodes section header (or use the path’s ⋮ menu). The Create Node sheet opens.
Fill the node form
The required field is the Learning Objective — it becomes the node’s title. Optionally set a Prerequisite, a Due Date (Optional), and a published toggle (drip-feed nodes by publishing them when you’re ready).
Build its checks and write the Engagement
Open the node to reveal its Checks section and, under it, the Engagement. The Engagement holds the node’s Questions between an optional intro and outro (Edit Engagement Story); questions are covered in Authoring quizzes. The Checks are the subject of their own page, Build a node’s checks.
Trash, restore points and undoing a delete
Nothing you delete or let the AI overwrite is gone straight away.
- Trash keeps deleted work for 30 days. What you delete from a campaign, such as a path, a node, a check or a question, waits in the campaign’s Trash, with the progress students made on it. Delete something and a Moved to Trash message appears with an Undo; once it has gone, open Trash from the unit’s ⋮ menu. The sheet is headed Deleted from this campaign. Each row says what it was, how long ago it was deleted, how many students have progress there, and what removed it (Teacher, AI save, Restore or Removed). Restore puts it back with its students’ progress; Delete forever removes it for good, and that cannot be undone.
- Restore points are kept before every AI save, the last 10. Open Restore points from the same menu: the sheet is headed Before each AI save, and restoring one (after a Restore this point? confirmation) puts the campaign back as it was then. The receipt after an AI save also carries Undo this save, which does the same for that one save.
- A deleted campaign waits 30 days too, in the House’s Deleted campaigns. See The House page.
Restore points are separate from the wizard’s own Step back, which undoes the wizard’s last few moves inside one session. See Generate objects with the AI Wizard.
Editing an existing course needs edit rights
Creating a course is open to everyone, but editing one is not. You can edit a course you created, and so can a collaborator the owner invited as an Editor. A collaborator invited as a Teacher can read the published course and run their own Parties, with no editing and no drafts. Deleting a unit is narrower still: the House’s owner or an admin only; deleting the last unit leaves the course standing. See The House page. Empty states you’ll see: “No Paths yet” and “No nodes yet - use AI Generate or add manually”.